Author Topic: Mike's ROTJ Boba Fett  (Read 10207 times)

Offline CadBane3

Re: Mike's ROTJ Boba Fett
« Reply #15 on: November 13, 2017, 09:16:34 PM »
Holy Fett! What have I gotten myself into?!?! Well, the good news is that after about 6 months of waiting, my commission paint parts are back. The bad news is that I am totally overwhelmed!!!

20171113_205637 by Michael Halstead, on Flickr

There's not even room for them on my workspace so they are having to lay on top of the Cad Bane parts! LOL

20171113_205642 by Michael Halstead, on Flickr

Bobafetthascollegedebt did an amazing job on them and I am very happy with the work he did.

20171113_205702 by Michael Halstead, on Flickr

I guess what I'm saying is that stuff just got real.

20171113_205728 by Michael Halstead, on Flickr

20171113_205746 by Michael Halstead, on Flickr

I need to hit the Dented Helmet forum hard and start researching all the new questions that I have. Like how do you secure a rocket to a gauntlet? How do you add hinges on the gauntlets? How do you best secure the armor to the flak jacket? What about if you are too large for the cod and back piece to fit around you? What kind of hoses do I need to have come off the gauntlets and where do I attach them up my arm? How do I secure knee darts to the knees? You know, the important questions that a young boy may ask his father... if he wasn't unceremoniously beheaded right in front of me... Damn Jedi...

I also have a jetpack finally and have shipped it off along with my shin tools for some paint. Once both of those are back, probably in another 2-3 months minimum, I'll have at least acquired all the parts I need and only need to assemble and finish them for submission photos.

I'm going to shelve this all for tonight and then if work permits, take it all out tomorrow, get better pictures and start to compartmentalize what I need to do and start hitting things one thing at a time. Should be a fun ride to the finish!
« Last Edit: November 13, 2017, 11:10:14 PM by Greedo10360 »
  • Like
Mike
TK/TB/BH/DS/DZ-42125

Offline Lidocaine

Re: Mike's ROTJ Boba Fett
« Reply #16 on: November 13, 2017, 09:29:59 PM »
Excellent!!!!

« Last Edit: November 13, 2017, 09:31:55 PM by Lidocaine »
  • Like
Luke - BH/TB/TK-44228

Offline CadBane3

Re: Mike's ROTJ Boba Fett
« Reply #17 on: November 15, 2017, 01:38:14 PM »
Alright, well work slowed down enough today that I was finally able to go through the pieces I received and get better pictures of each and start to put together a game plan as to how I will tackle them. Some good discoveries, some bad, but lots of work to do.

First, the knees. Now these were the most recent version from RKD and are supposed to have a front plate as well as a back plate and a way to secure the knee darts to them. My commission painter seems to have misplaced the back part, so I really only have the front of the knees and will need to come up with something creative to attach the knee darts. They are aluminum so magnets are out. Possibly thinking about something with Worbla on the back portion to secure them forever. I also need to add the strapping and weather the strapping. Seems like that could all be tackled pretty easily, but I'm going to give my painter a few more days to see if he notices any knee pieces laying around his workshop as I'd sure love to have that inner support to strengthen them and fully adhere the darts.  Anyway, they are beautiful.

20171115_130855 by Michael Halstead, on Flickr
  • Like
Mike
TK/TB/BH/DS/DZ-42125

Offline CadBane3

Re: Mike's ROTJ Boba Fett
« Reply #18 on: November 15, 2017, 01:42:27 PM »
Next up, the shoulders. These also are quite stunning and I really like them. As far as I can tell, they only need to be secured to the flak jacket. Should be easy, but I'm a bit torn as to whether I want to use Chicago screws as Luke has advised or try using a pin and backing method that I've seen floating around TDH. The pin and backing is tempting due to the ability to just remove the piece and move it if they are in the wrong spot.

20171115_130951 by Michael Halstead, on Flickr

Sticking with the upper torso, here is all the ab and chest armor. See above for the discussion on securing them to the flak.

20171115_132355 by Michael Halstead, on Flickr

And here is the flak.

20171115_132502 by Michael Halstead, on Flickr

I may have put on a bit of weight since I bought it and will need to talk to current Bobas about how tight it needs to be. I have my harness and that needs to go under it, so maybe I just need to finish that up and give it a test fit. Might be close.

Here is the back and neck piece, also beautiful:

20171115_132532 by Michael Halstead, on Flickr
  • Like
Mike
TK/TB/BH/DS/DZ-42125

Offline CadBane3

Re: Mike's ROTJ Boba Fett
« Reply #19 on: November 15, 2017, 01:44:58 PM »
Here are a few odds and ends. The cape:

20171115_132649 by Michael Halstead, on Flickr

and the pouches and spats:

20171115_132437 by Michael Halstead, on Flickr

Thank god those will fit no matter how big I get. Which brings me to the next problem. The cod/butt area. My painter cut them to take off too much and there is about a 2 inch gap on either side. That gap will be covered by the pouches, girth belt, etc. etc. but I need to get rid of it. I am going to have to find some ABS pieces and paint them up to match to create some shims. Damn. Two steps backwards...

20171115_132605 by Michael Halstead, on Flickr
« Last Edit: November 15, 2017, 01:51:41 PM by Greedo10360 »
  • Like
Mike
TK/TB/BH/DS/DZ-42125

Offline CadBane3

Re: Mike's ROTJ Boba Fett
« Reply #20 on: November 15, 2017, 01:47:52 PM »
Lastly, the gauntlets. These are amazing but also overwhelming.

On this one, I need to secure the missile to the gauntlet and insert the flamethrower nozzles and keep them from falling out. I also need to add hinges or some type of closure. Lots to do.

20171115_132154 by Michael Halstead, on Flickr

On this one, I need to repair the hose attachment that fell off in shipping and then add the hoses that will run up my arm. Also, it will need hinges or some type of closure.

20171115_132307 by Michael Halstead, on Flickr

They sure are pretty though...

So, lots to do but if I tackle it one problem at a time, I'm hopeful that I can be done with these parts in time for the jetpack to get back to me. We'll see.
  • Like
Mike
TK/TB/BH/DS/DZ-42125

Offline carpe mindiem

Re: Mike's ROTJ Boba Fett
« Reply #21 on: November 15, 2017, 02:04:36 PM »
Awesome!
  • Like

Offline Lidocaine

Re: Mike's ROTJ Boba Fett
« Reply #22 on: November 15, 2017, 02:44:32 PM »
Knees - I had a pair of RKD knees originally and they came with a hard foam insert. Basically you'd drill a hole where the darts go and then they'd be glued to the hard foam. I have velcro on the inside of the knees that attaches to the flight suit, they helps prevent them sliding down. Lastly, Grab some 1" elastic for the backs of the knees and use snaps on the elastic and then snap plates on the insides of the knees. Makes it a bit easier to get on/off.
  • Like
Luke - BH/TB/TK-44228

Offline CadBane3

Re: Mike's ROTJ Boba Fett
« Reply #23 on: November 15, 2017, 02:54:21 PM »
Knees - I had a pair of RKD knees originally and they came with a hard foam insert. Basically you'd drill a hole where the darts go and then they'd be glued to the hard foam. I have velcro on the inside of the knees that attaches to the flight suit, they helps prevent them sliding down. Lastly, Grab some 1" elastic for the backs of the knees and use snaps on the elastic and then snap plates on the insides of the knees. Makes it a bit easier to get on/off.

Nice! Seems easy enough. Since I have no foam from RKD now, I may get creative, but sounds like something I can handle!  :D
  • Like
Mike
TK/TB/BH/DS/DZ-42125

Offline CadBane3

Re: Mike's ROTJ Boba Fett
« Reply #24 on: November 18, 2017, 04:39:28 PM »
Small update today because I didn't have too much project time, but progress is progress. First, during shipment, one of the hose attachments for one of my gauntlets came off. The glue just failed.

20171118_154955 by Michael Halstead, on Flickr

This has to have a hose attached to it that will run up my arm, so I assume it gets a good deal of pressure put on it, so I didn't want to just glue it back. So, I reverted to my table top miniatures background and decided to try pinning it using a drill and part of just a standard nail:

20171118_155739 by Michael Halstead, on Flickr

Drilled holes in each side and glued the nail in:

20171118_160634 by Michael Halstead, on Flickr

And then glued it all back together:

20171118_160739 by Michael Halstead, on Flickr

Will it work? I dunno. We'll have to see once it dries and I can put some pressure on it to see if it will hold up.

Second thing I started work on was the knees. Needed to install the knee darts so I started with drilling holes. This wasn't easy and ended up with much cursing and exacto knifing but in the end, I got generally round holes that will work.

20171118_153921 by Michael Halstead, on Flickr

20171118_154724 by Michael Halstead, on Flickr

Now, as Luke says, the armor is supposed to have foam that the darts glue on to, but as noted, my foam was lost in shipment to my painter and back. No worries, I have Worbla! So I laid down a layer on the knee plastic, so it would adhere to itself and built a little part that will seal it shut.

20171118_161314 by Michael Halstead, on Flickr

Hit it with the heat gun and shape it a bit, and it hugs the darts pretty well:

20171118_162129 by Michael Halstead, on Flickr

Repeat for the other side, but this time I slathered some e6000 in there to see if that makes a stronger bond. I'll find out if they fall out on a troop.

20171118_162637 by Michael Halstead, on Flickr

They ended up looking like this:

20171118_162648 by Michael Halstead, on Flickr

Now to let them dry and see how strong it holds:

20171118_162727 by Michael Halstead, on Flickr

I figure even if they fall out, then I can just slather in more e6000 when I put them back in and they'll have the plastic to adhere to.

After they dry, I can add the elastic straps and a little Velcro to hold them on my knee on the suit, a little paint to the darts, and they should be done!
« Last Edit: November 18, 2017, 04:59:43 PM by Greedo10360 »
  • Like
Mike
TK/TB/BH/DS/DZ-42125

Offline Jimsidious

Re: Mike's ROTJ Boba Fett
« Reply #25 on: November 19, 2017, 09:33:40 AM »
wow Mike, I really want to do a Fett Im super jelly thats lookin awesome man
  • Like
Its not the east or the west side, (no its not)
Its not the north or the south side, (no its not)
Its the dark side... (you are correct)
You can't front the Empire
To all you Vader Haters out there...
We'll blow your planet up!

Offline CadBane3

Re: Mike's ROTJ Boba Fett
« Reply #26 on: December 08, 2017, 02:41:53 PM »
Took another day off work and that means I got to play around with my hobbies! Spent a little time with Boba today and am making slow progress. So, I wanted to secure the armor to the flak jacket. This flak jacket is pretty darn tight (like physically tight, not tight like the kids say) and I'm not certain that it will work as I need to fit my harness under it. May need to shop in the Boba Fat section for another...

Anyway, since I wasn't certain that it would work, I decided to forgo Chicago screws and cutting holes in the flak and I went with the jewelry pin and clutch backs. The hope is that enough of them are used so that the armor doesn't fall off and if one or two fail during a troop, the remainder will be strong enough to keep the armor attached. We shall have to see.

So, first, I marked on the armor where I wanted to secure the pins:

20171207_103104 by Michael Halstead, on Flickr

Then, I sanded and roughed up the area so that the epoxy would have something to grip:

20171207_103656 by Michael Halstead, on Flickr

Then, I did the same to the pins:

20171207_113144 by Michael Halstead, on Flickr

Then I got the most caustic, horrible smelling stuff I could find. Says it works on plastic and metal! Best of both worlds!

20171207_140335 by Michael Halstead, on Flickr

Next time, open a freaking window first. Stupid. At least it was a free high... well, $10 or something like that... Anyway, I got them all attached and I even secured the red screen for my chest electronics:

20171207_161741 by Michael Halstead, on Flickr

Then I Gorilla Taped my electronics into place. Not sure if this will keep it in place over the course of multiple troops and the sweat test, but it's a first attempt, so we shall see:

20171208_125440 by Michael Halstead, on Flickr

Looks cool to me:

20171208_125452 by Michael Halstead, on Flickr

Then I secured the armor to the flak. Took three or four attempts and a few finger pricks to get it where I like it.

20171208_133326 by Michael Halstead, on Flickr

Obligatory bathroom selfie! I'm fabulous. I know the costume needs more pleather, but you don't know what I have on under here. Maybe those pics are for my other blog... LOL

20171208_140409 by Michael Halstead, on Flickr

I think the armor is pretty well placed but am open to feedback. I need to raise up my belts but that may get sorted out when I have the cod/kidney in place.

20171208_140456 by Michael Halstead, on Flickr

Anyway, so I started working on the gauntlets as well, but ran into a bit of a wall with the hinges. Need extensive research to learn how that works (and a build day with the resident Boba expert). Also, I'm nearly done with the knees. They need some paint on the darts and then elastic to keep them on, plus Velcro to keep them in the right place on the suit. I need to work on getting the back armor attached to the front and need to come up with a solution for my cod/kidney armor. Plus my jetpack is needing painting, and my harness needs sewing, and... and... and.. Oh, man, at least I'm making some progress here and there.
  • Like
Mike
TK/TB/BH/DS/DZ-42125

Offline CadBane3

Re: Mike's ROTJ Boba Fett
« Reply #27 on: December 10, 2017, 04:38:01 PM »
Hello everybody! Me again! Well, I was told to smoke ribs today, so that means I have almost 6 hours of work time with minimal interruption, so I plugged away a bit on my Boba. Today, I decided to putter along on the gauntlets. This is the part that has seemed overwhelmingly difficult, but I think I have a pretty good direction now.

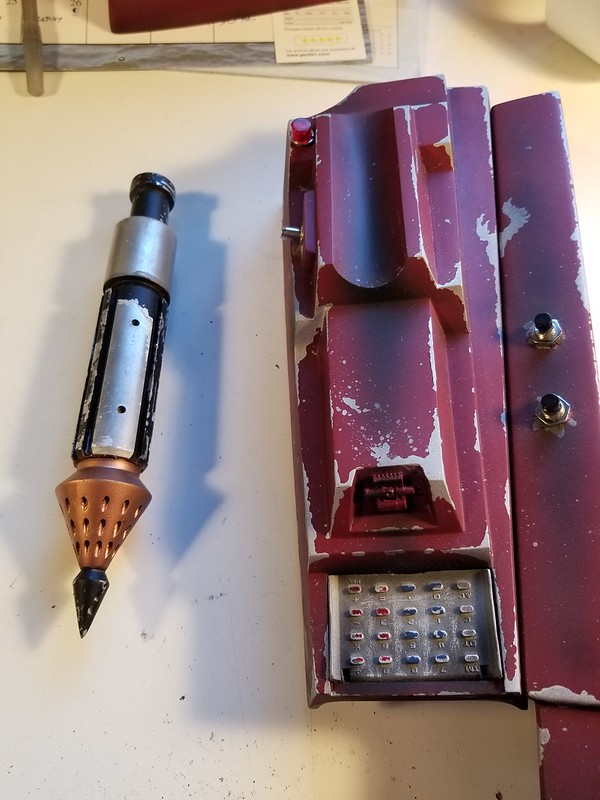
First, I wanted to get my rocket mounted on the gauntlet.

20171209_142531 by Michael Halstead, on Flickr

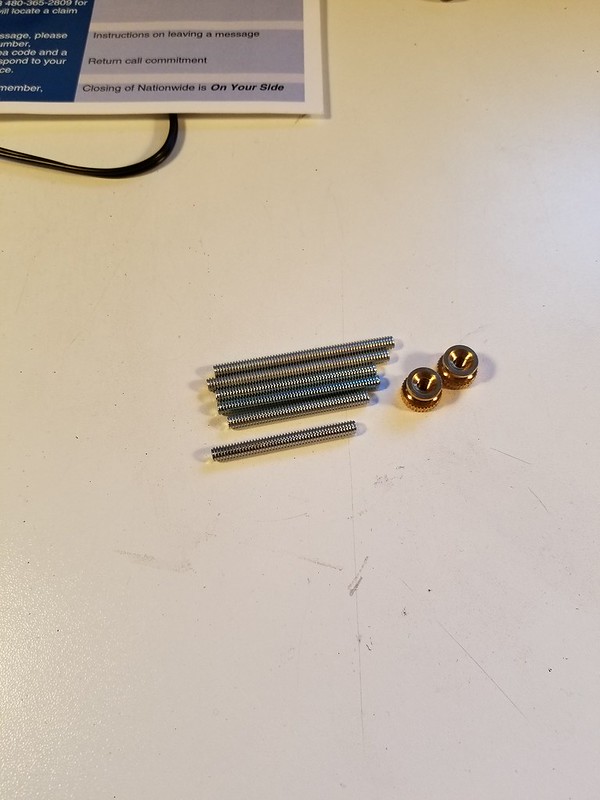
I was initially thinking about using the threaded rod to make a pin, and then have it go all the way through the gauntlet and use the nut to secure it from the other side.

20171209_142557 by Michael Halstead, on Flickr

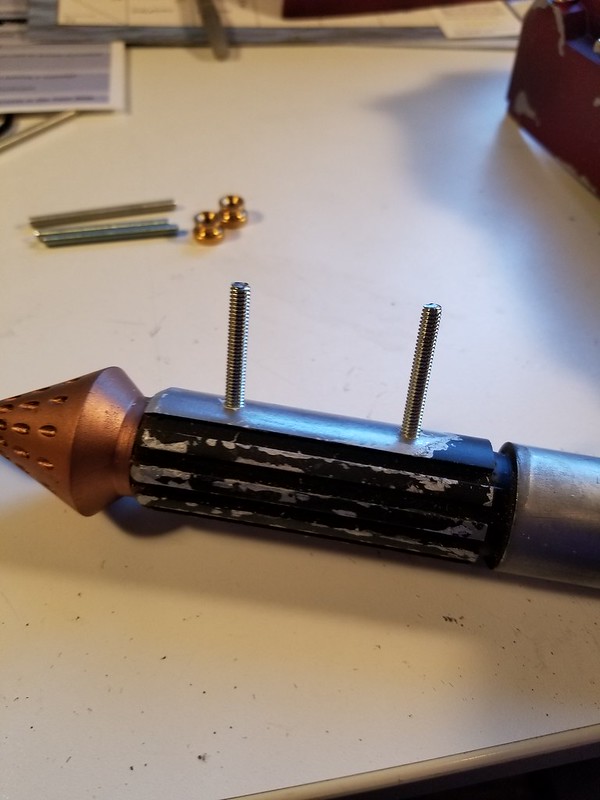
So, I secured the threaded rod to the rocket by drilling holes and using the epoxy from earlier:

20171209_143327 by Michael Halstead, on Flickr

And I started drilling the holes in the gauntlet:

20171209_144913 by Michael Halstead, on Flickr

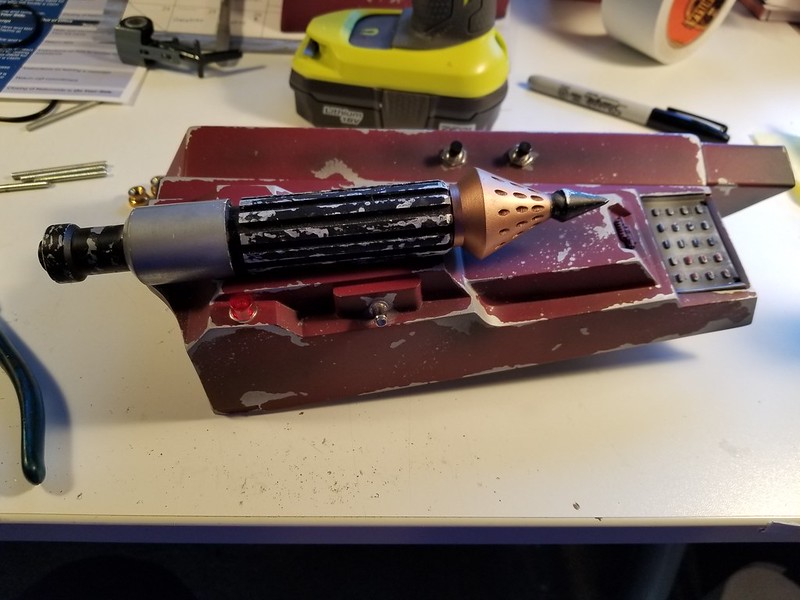
This was where I thought about it and thought, "why would I ever need it to be removable from the bottom? Seems like just something that would loosen and eventually fall off." Also, it would probably constantly poke my arm. So, I went the easy way and just epoxied the Hutt out of it and it'll be on until the end of time, I hope.

20171209_145941 by Michael Halstead, on Flickr

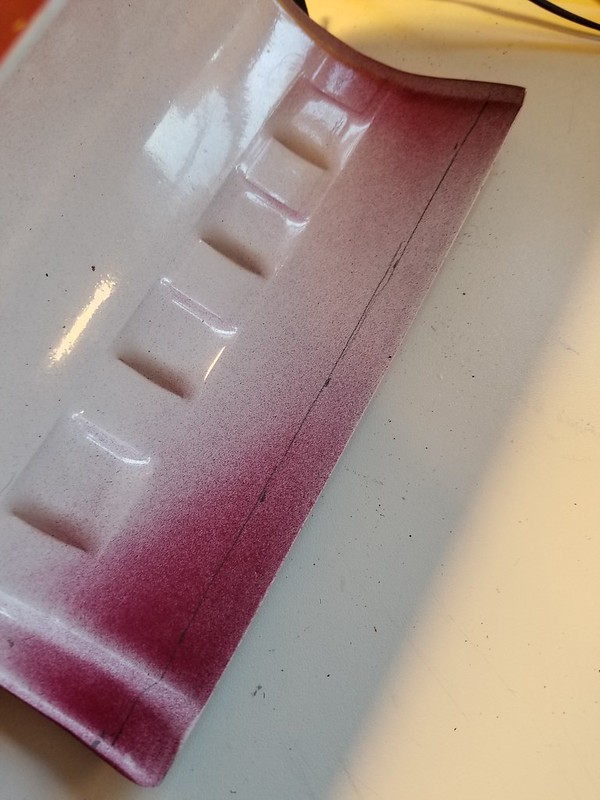
While that was drying, I grabbed the right gauntlet to start figuring out how it will fit. It's way too large and needed to be cut down:

20171209_153956 by Michael Halstead, on Flickr

I ended up taking about a half inch off each side of the bottom forearm.

20171210_112753 by Michael Halstead, on Flickr

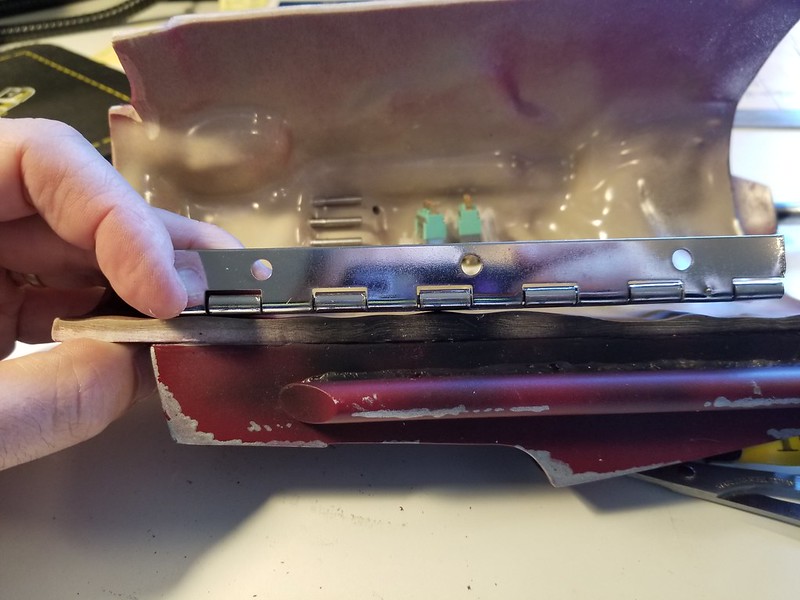
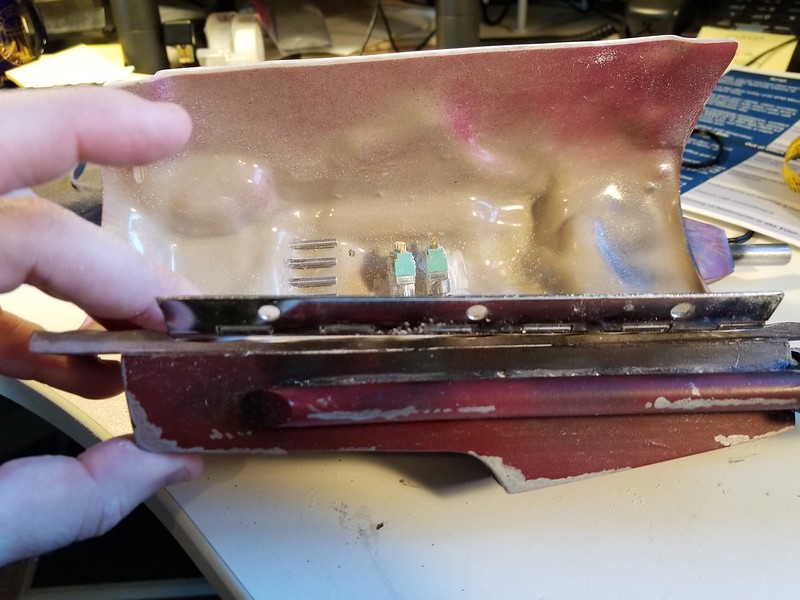
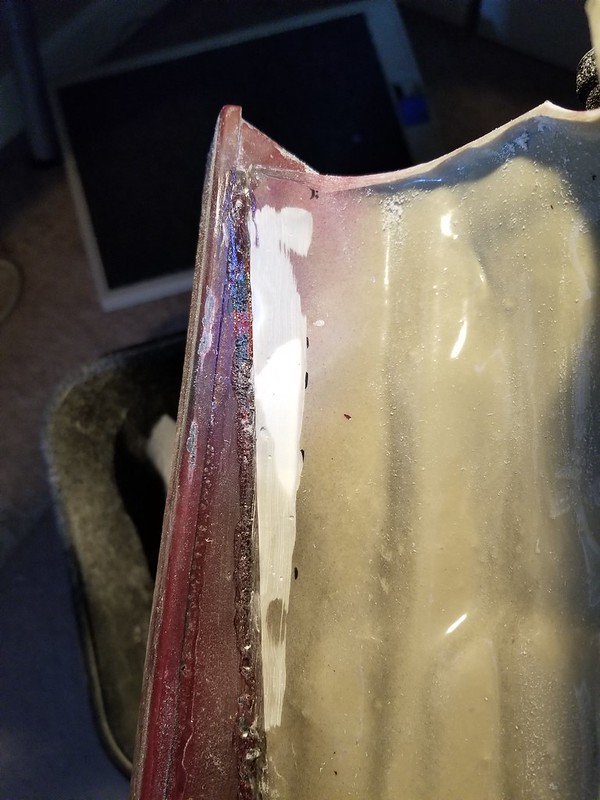
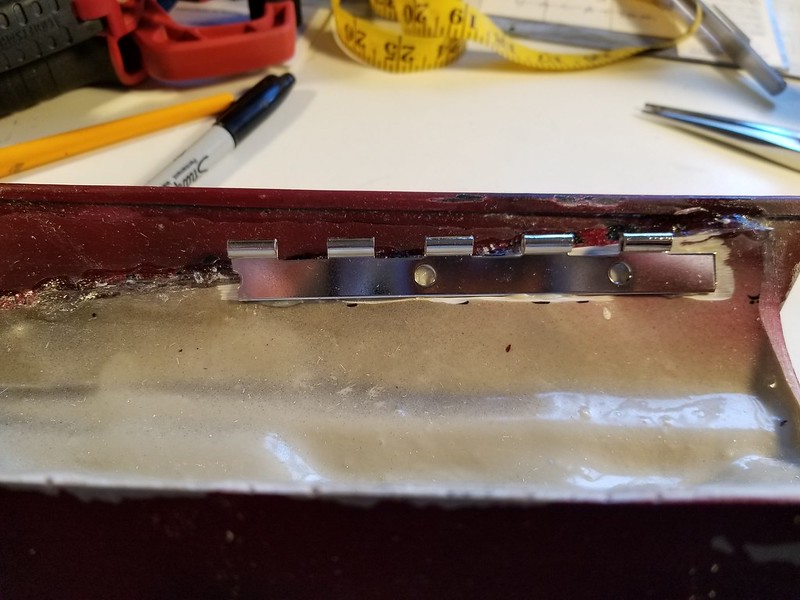
The next step, was seeing how the hinges would sit. The tops of the gauntlets are fiberglass and they are nice, but the inside is quite wavy and uneven, so they needed to be sanded down so the hinges would sit flat.

20171210_113810 by Michael Halstead, on Flickr

After a bit of sanding, I ended up with this:

20171210_123351 by Michael Halstead, on Flickr

Tough to see, but it sits nearly flush with the area I sanded. The epoxy has some volume to it as well, so it didn't need to be perfect.

20171210_123412 by Michael Halstead, on Flickr

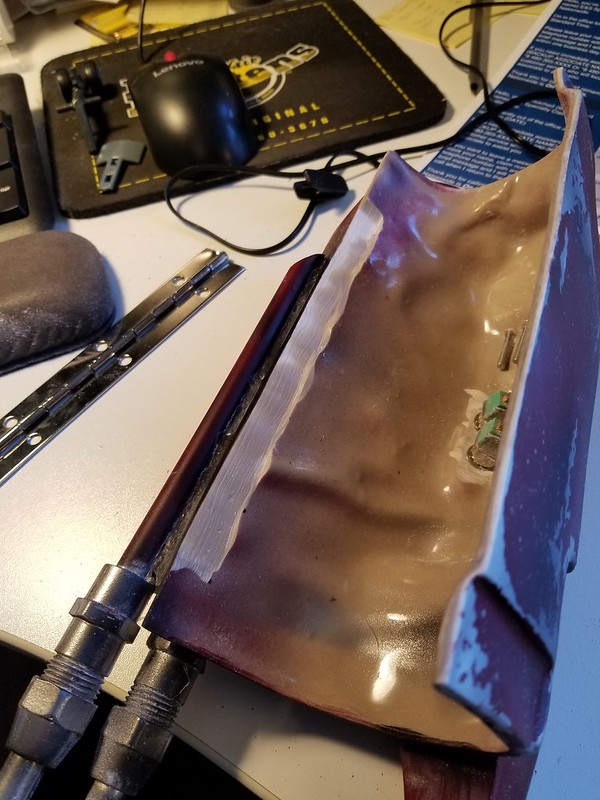
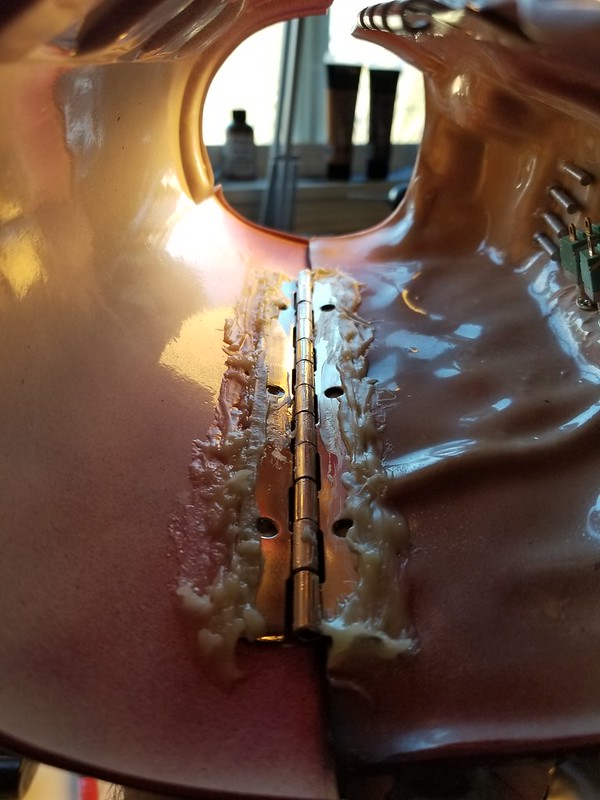
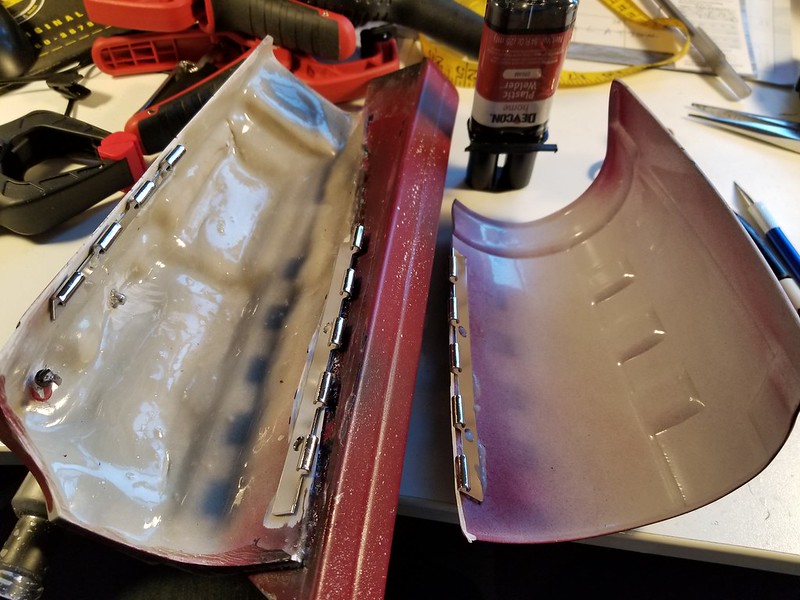
Not wanting these to fall apart, I epoxied the heck out of them! I'll go back and sand out the rough edges later.

20171210_132431 by Michael Halstead, on Flickr

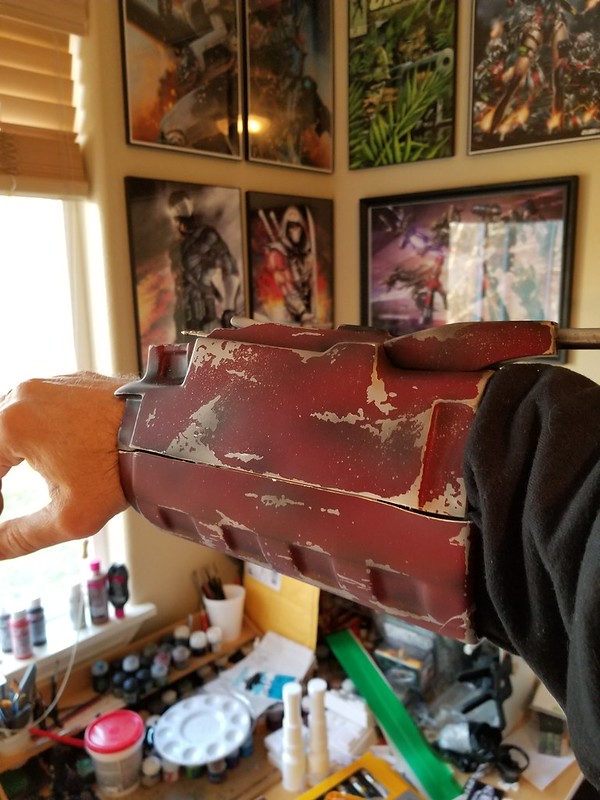
Both sides of the right gauntlet came out pretty well. I can pull the pin out of the bottom hinge and it'll open it up about an inch, enough for me to slip my hand out. Pretty happy with how this one came out.

20171210_152411 by Michael Halstead, on Flickr

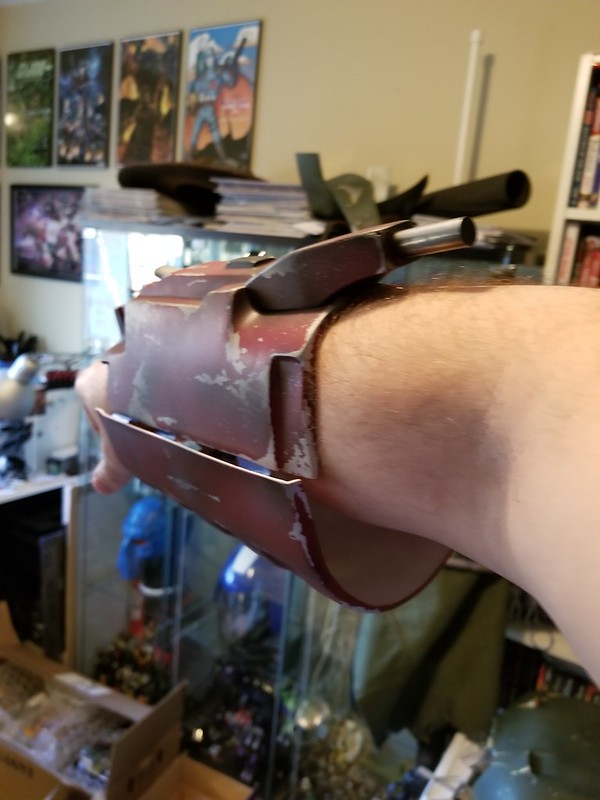
Now, it fits much better. I was wearing a sweatshirt, but it's near in volume to my flight suit:

20171210_152430 by Michael Halstead, on Flickr

I think I'll just need to add the hoses to that one and it's done.  :D

Repeat the steps with the left gauntlet:

20171210_140815 by Michael Halstead, on Flickr

20171210_141801 by Michael Halstead, on Flickr

20171210_151145 by Michael Halstead, on Flickr

20171210_123412 by Michael Halstead, on Flickr

20171210_154715 by Michael Halstead, on Flickr

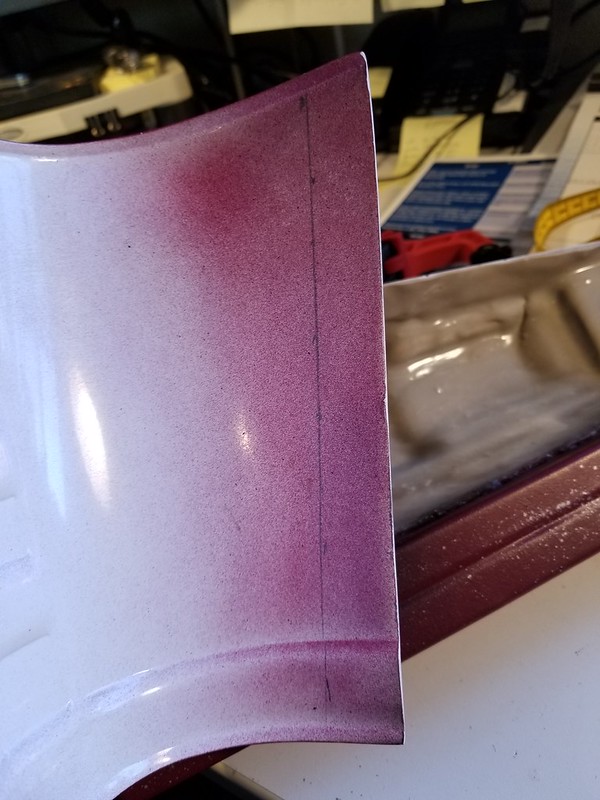
And this is about where I'm leaving them for today. One more half hinge to mount but I want them to dry a bit and I need to figure out a way to bend the bottom forearm section so it has a better curve to it. Anybody got any ideas? I tried heating it up with my heat gun and putting gentle pressure on it but that didn't work too well. Just don't want to snap it in half. Anyone know what I can do? Thanks!
  • Like
Mike
TK/TB/BH/DS/DZ-42125

Offline carpe mindiem

Re: Mike's ROTJ Boba Fett
« Reply #28 on: December 10, 2017, 06:06:44 PM »
Nice!

But....

....Where are pictures of the ribs?
  • Like

Offline CadBane3

Re: Mike's ROTJ Boba Fett
« Reply #29 on: December 10, 2017, 06:57:42 PM »
Here ya go, Mindie! And yes, they're real, and they were spectacular!

20170630_165501 by Michael Halstead, on Flickr
  • Like
Mike
TK/TB/BH/DS/DZ-42125

Tags: